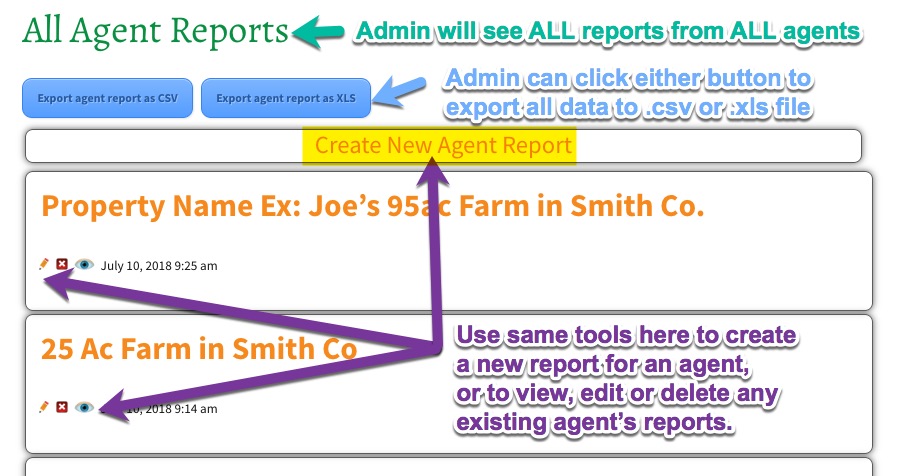
Admins can log in and visit the “All Reports” page to view, edit, delete or export ALL reports from ALL agents
Visit yourwebsite.com/all-agent-reports (replace yourwebsite.com with your actual website URL)
Visit yourwebsite.com/all-agent-reports (replace yourwebsite.com with your actual website URL)
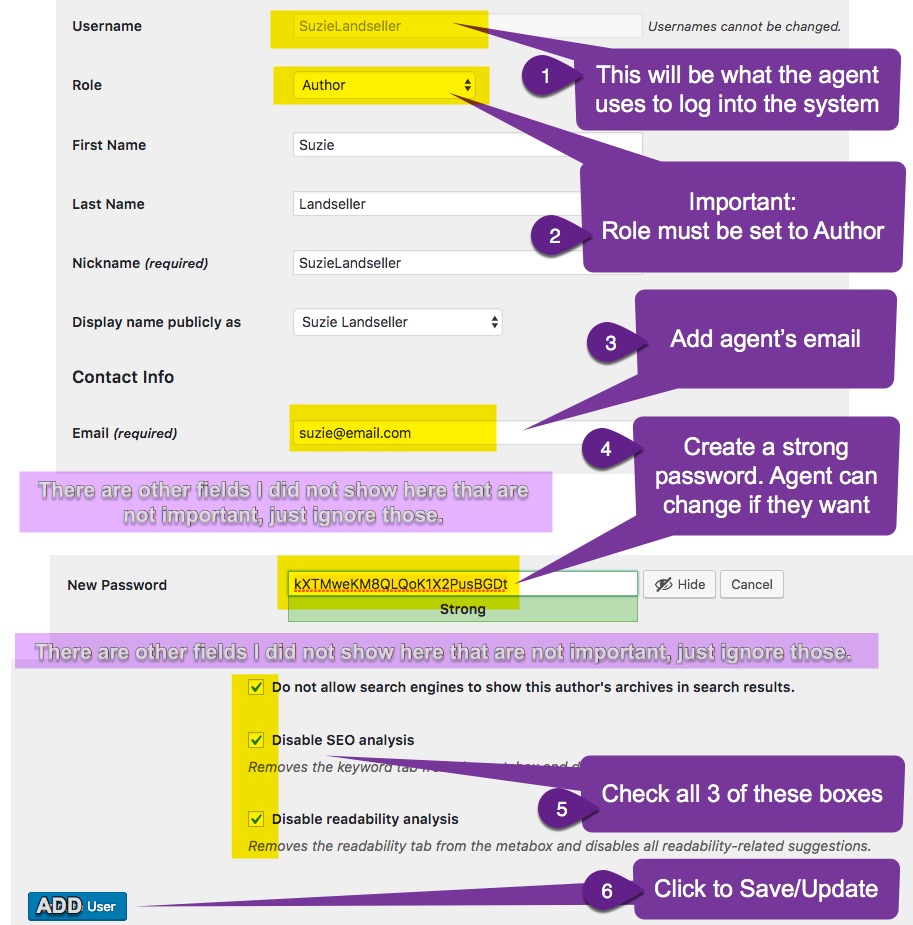
The website management will need to add new agents to the admin area in WordPress before the agent can submit reports.
NOTE:The agents will NOT have access to any other admin areas, only their own reports.
The agent should be able to log into the Agent Reporting System immediately. The agent can click “Forgot My Password” to get an email with a link to reset their password to something new.


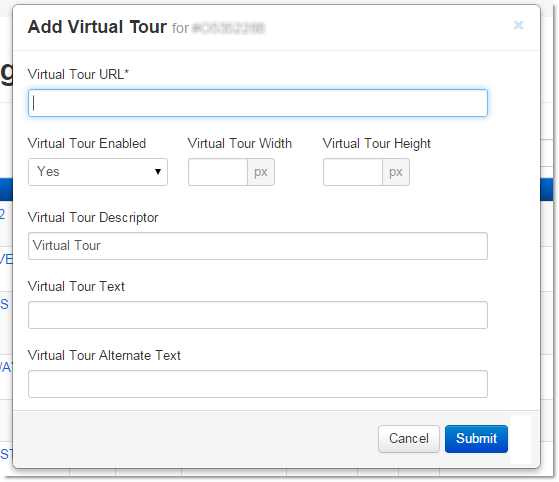
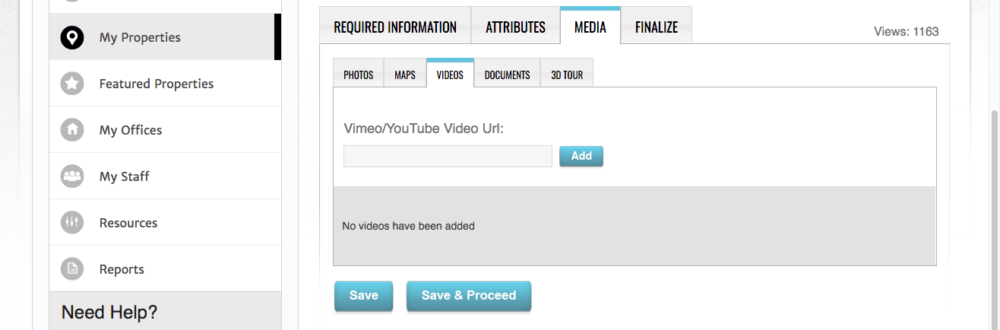
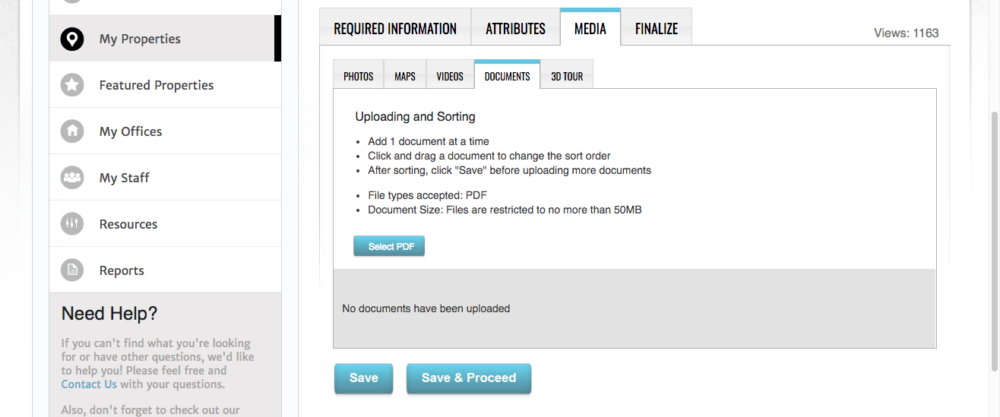
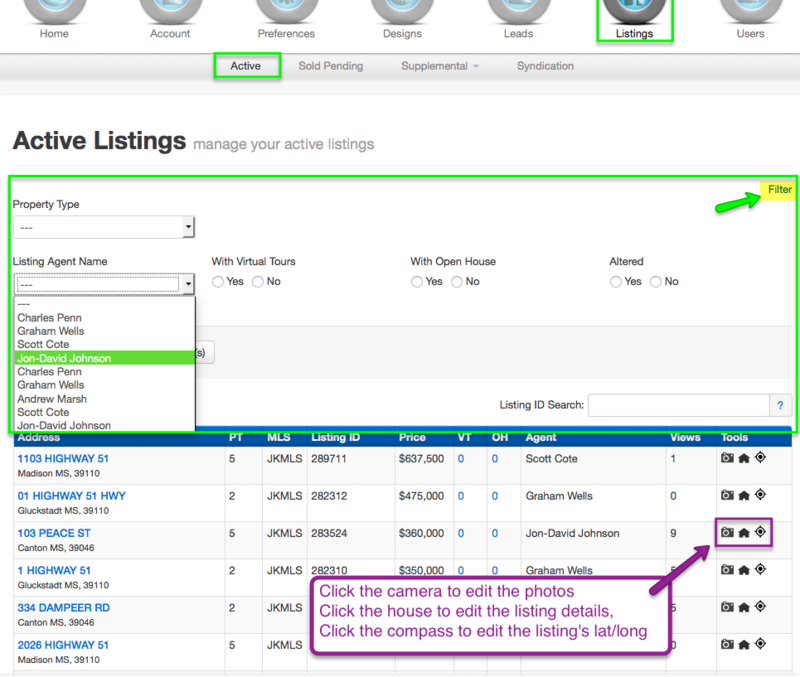
Virtual tours are listed in the “VT” column. To enter in a new virtual tour, click the number under the VT column for the listing you would like to edit.

A pop-up box will appear where you can enter in information about the virtual tour. In the Virtual Tour URL field, be sure to enter in the entire link for your virtual tour, including the http://. Make sure Virtual Tour Enabled is set to Yes, and enter in a width and height for the the pop-box that will display your virtual tour. Enter in the rest of the details, and then click Submit.
You can view the virtual tour on a listing by viewing its search results or property details IDX page.
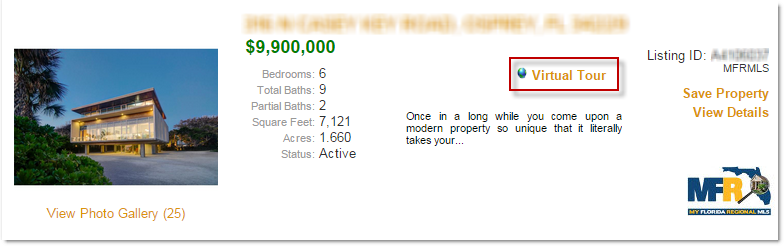
Note: In many cases, a virtual tour may be automatically linked to a property by the MLS, requiring no action on your part.


When you view a website in a browser, your computer downloads every item on the site (the logo, text, photos, etc.). This is why a website with many large images will take longer to load, because there is a lot of content to download to your computer before you can view it. Web browsers download the files, and stores them on your computer’s hard drive in a temporary folder.
So when you visit the same page for a second time, the browser speeds up display time by loading the website files from your computer’s hard drive cache, instead of downloading everything again. These downloaded and stored website files are called “Cache” files, or “Internet Cache” or “Temporary Internet Files”.
Sometimes your browser may not see that there is something new and it will continue to display the files from your hard drive instead of downloading new files from the site. So, by deleting the stored files from your cache and then returning to the site, your browser is forced to download all new files, so you are sure to be seeing the most up-to-date content.
It depends on which browser you are using, whether Google’s Chrome, Mozilla’s Firefox, Microsoft’s Internet Explorer, Mac’s Safari or others. Click the button below to go to a website that shows you simple directions for all browser types.
Learn How to Clear Your Cache
In the same way that your web browser has a cache of recent web pages, your Internet Service Provider (ISP) may be doing some additional caching for you, to make your internet speed even more fast. In some (rare) cases, site content won’t update because your ISP is showing you their cached files. When this happens, you will have to talk with your ISP to fix the problem by asking them to clear your cache on their end. We are happy to speak with them on your behalf if you would like, just ask!

https://middleware.idxbroker.com/mgmt/
username:
password:
This could include listings that are sold or pending, canceled, expired, etc.
We do not receive sold and pending listing data from the MLS, so we will not know the actual status of the listing (sold or pending vs. canceled, withdrawn, expired, or other inactive statuses) so they will initially be listed with a status of “Unknown”.

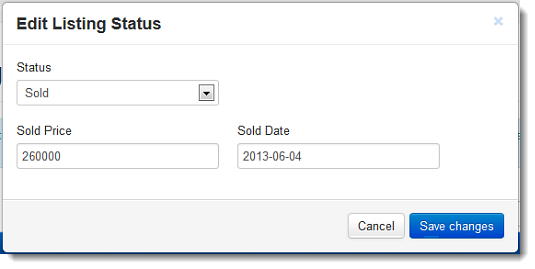
The updated listings (with a status other than UNKNOWN) will now appear on your Sold/Pending page.
Listings with an ‘unknown’ status will be removed from your account after 60 days. Update the status to keep listings in your account indefinitely.
https://middleware.idxbroker.com/mgmt/
username:
password:
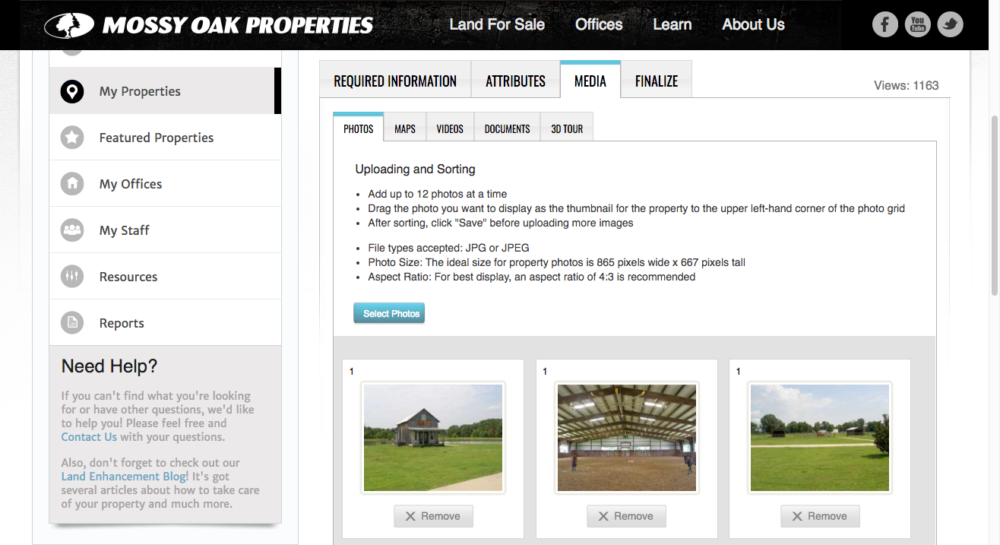
The website software will select all images that are large enough for your slideshow dimensions and add them to the slideshow for you. It will also create a title for the slideshow image based on the property title. And, all images will automatically link to the listing that the image is from, so site visitors can click on any image they like, and it will bring them right to the listing.
While the automatic slideshow creation is helpful if you would like less maintenance on your website, sometimes you might want to control which images show and even what order. This system allows you to do just that.
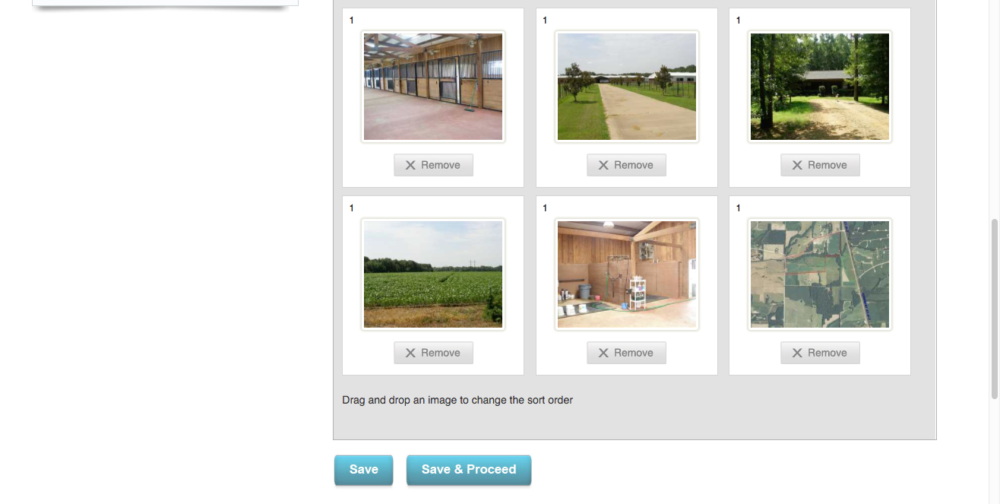
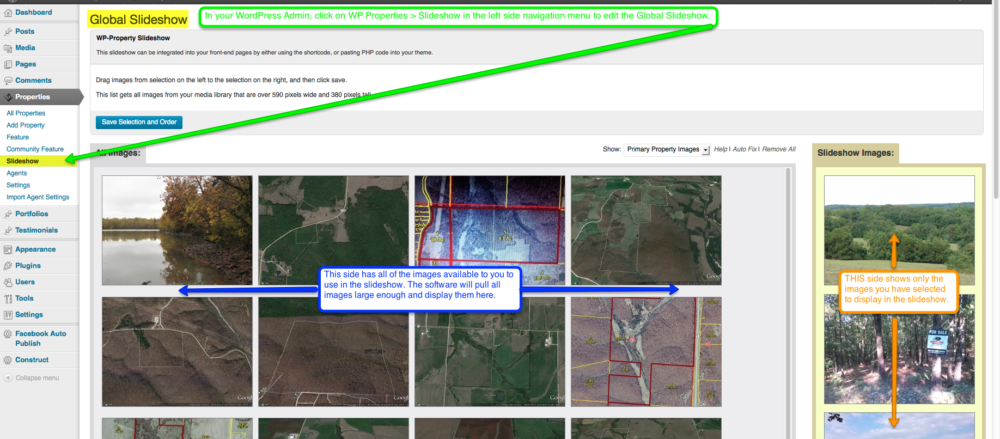
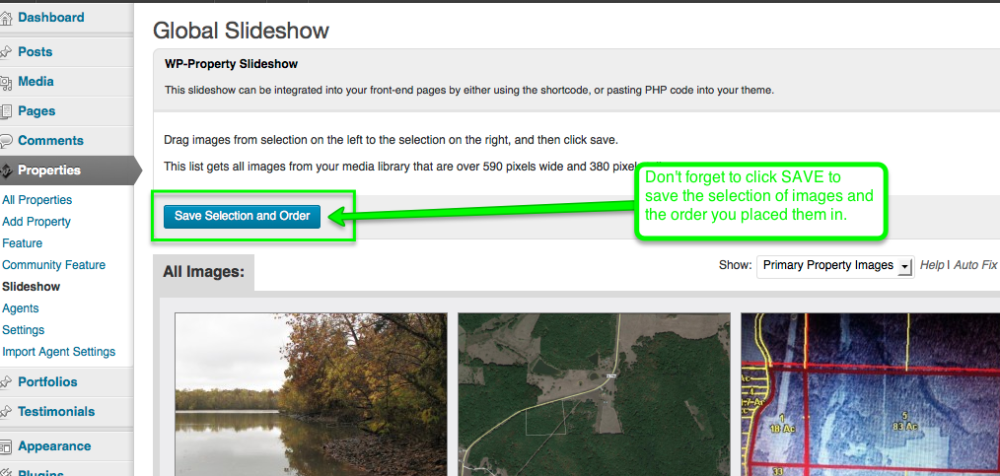
Follow the directions in the images to see how to modify the slideshow.
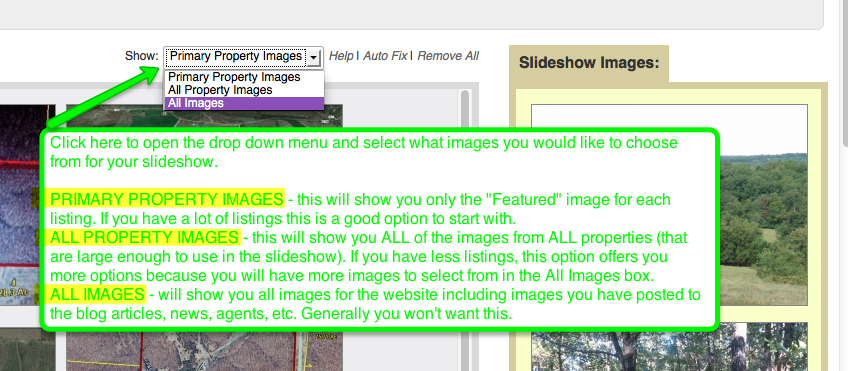
If you would like to change what images you have to select from in the left side:
Once you have determined which images will be in the left side box as options for your slideshow, next you can determine which images of these you will actually include in the slideshow.
The easiest way is to simply click “Auto Fix” (seen in the above image) which will move all images that are too small to the left box (so they will not appear in the slideshow) and moves all images that ARE large enough into the right-side gold colored box, and these images will show in the slideshow.
Another tool is the “Remove All” link (also seen in the above image) which will move ALL images from the gold Slideshow Images box on the right, to the All Images box on the left. This will leave your slideshow empty, so after you do this you will want to manually move some images into the gold box in order to have images display in the slideshow.
Whether starting from empty after clicking “Remove All” or starting with some images already in the gold Slideshow box, you can add more images to the Slideshow by simply clicking on an image in the left side box and dragging it to the gold box on this page. You can also drag and drop the images in the gold box UP and DOWN to rearrange them.

And most importantly:

Menus work in a hierarchy system that distinguishes each of the different menu items by name and by placement. The Menu Items at the top of the list in the Editor will appear on your website from left to right.
 Mossy Oak Properties Agent Website
Original price was: $5,000.00.$3,500.00Current price is: $3,500.00.
Mossy Oak Properties Starter Website
Original price was: $4,000.00.$3,000.00Current price is: $3,000.00.
Mossy Oak Properties Agent Website
Original price was: $5,000.00.$3,500.00Current price is: $3,500.00.
Mossy Oak Properties Starter Website
Original price was: $4,000.00.$3,000.00Current price is: $3,000.00.
 2025 Christmas Cards
From: $165.00
2025 Christmas Cards
From: $165.00